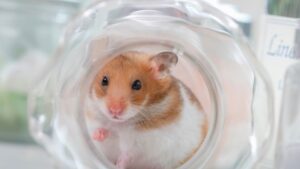
Can You Travel with a Hamster? A Comprehensive Guide
Traveling with a pet hamster isn’t as straightforward as it might seem. It requires careful consideration of your pet’s safety, comfort, and the logistics involved.

Welcome to the wonderful world of DIY hamster cages! Creating a custom habitat tailored to your hamster’s personality is incredibly rewarding.
With a bit of creativity and elbow grease, you can build them a stimulating home that store-bought cages can’t compete with. From whimsical palaces to mini woodland cottages, we’ll explore unique DIY cage ideas to spark your imagination.
Armed with simple tools and materials, you can construct the multi-chamber cage of your hamster’s dreams! Let’s get started.
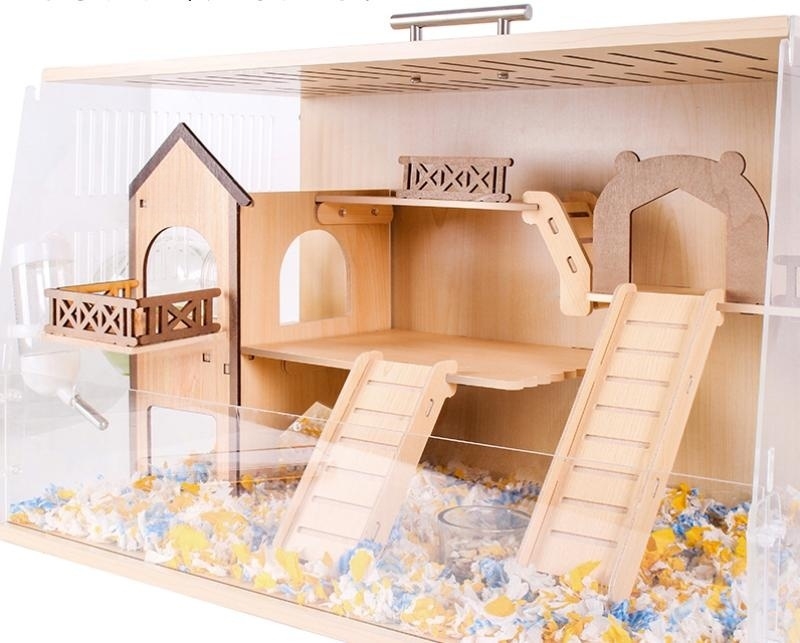
Let your hamster’s habitat reach new heights with a stacked wooden treehouse. Using all-natural pine, build a multi-tier tower with hideaways, bridges, and ladders connecting each level.
Include an internal winding staircase and ground-to-roof pole for climbing exercises. Add a miniature crow’s nest on top for scenic surveying.
With custom platforms and accessories, you can create a functional treehouse your hamster will adore.
To build the treehouse, source untreated pine boards and dowels for construction. Cut boards to size and drill holes to insert stabilizing dowels. sketch out floor plans for each level considering space requirements.
Ensure ramps and ladders between floors are not too steep. Craft hideaway cubes and lookout holes in the sides of the tower. Add rope bridges between platforms for added adventure.
Incorporate a winding staircase between floors and a tall pole with pegs for climbing. Apply natural wood finishes or use wood stains for an earthy look. Introduce greenery such as mini potted plants to enhance the treehouse atmosphere.
Challenge your hamster’s navigation skills with a 3D wire maze cage. Cut and join wire cube grids at angles to build an interconnected multi-level labyrinth.
Incorporate peepholes, crawl-throughs, dangling tunnels, and puzzle treats to encourage exploration. Use sturdy transparent plastic or mesh for hamsters enclosure walls to add views without sacrificing security.
With mental and physical enrichment, this geometric maze habitat will prevent boredom.
To construct the maze, purchase wire cube storage grids and wire cutter pliers. Cut and rearrange cubes to form a web-like maze with multiple pathways.
Create interest by varying tunnel sizes – some big enough to roam freely, others requiring squeezing through. Connect levels with ladders and ramps in zigzag patterns to disorient your hamster pleasantly.
Weave tunnels through cubes to form obstacles. Link dead-ends and use treats to motivate poking into every crevice. Add transparent mesh panels to enable partial sees while retaining security.
Choose a bold color like red for high contrast against white maze walls. The mental challenge and exercise will keep your hamster engaged.
Design an envy-worthy mini dollhouse mansion for your tiny furry friend. Fashion is a two-story house with furnished rooms, shingled roofing, and façade detailing.
Include windows, balconies, stairs, and a spiral slide-out back. Build removable wall segments for easy cleaning access.
Deck out the interior with DIY hamster-sized furniture, floral rugs, and chandeliers. Bring the dollhouse to life with a landscaped yard, white picket fence, and detached greenhouse or garage.
To build, cut plywood for the façade and paint trim details like window frames and shingles. Wrap the roof edge in miniature molding.
Cut sidewalls with room openings, then add windows and balconies fashioned from popsicle sticks. Build furniture like beds, couches and chairs using scraps and cotton stuffing.
Craft tiny rugs from fabric scraps and felt. Incorporate Lego chandeliers and table lamps for lighting. Utilize artificial turf, along with miniature bushes and trees, to establish an inviting yard.
Attach a greenhouse made from an old clear plastic container. The charming miniature details will delight both you and your hamster.
Craft an adorable log cabin hideaway your hamster will never want to leave. Cut thin birch wood logs and notch them to interlock at corners.
Build an A-frame roof with faux wood shingles. Add a covered porch with beam supports and a cutout step entrance.
Install petite windows and a classic wooden door. Line the walls with natural jute for burrowing enrichment.
Furnish the inside with pine platforms, ladders, and stump hideouts. The cozy log cabin ambiance will make your hamster feel right at home.
To build the log cabin, source thin birch branches or dowels and cut notches to interlock at corners. Cut a triangle front and back for the A-frame roof.
Use squares of sandpaper for shingles. Build a covered porch entrance from Popsicle sticks and glue or sew tiny jute doormats.
Add windows framed in twigs and a miniature wooden door. Make ladders from sticks and platforms from wood slices.
Include tree stump hideaways. Decorate the interior with tiny pinecones, wood chip flooring, and fairy lights to amplify the cozy vibe. The natural wood textures and colors will fashion a serene sanctuary.
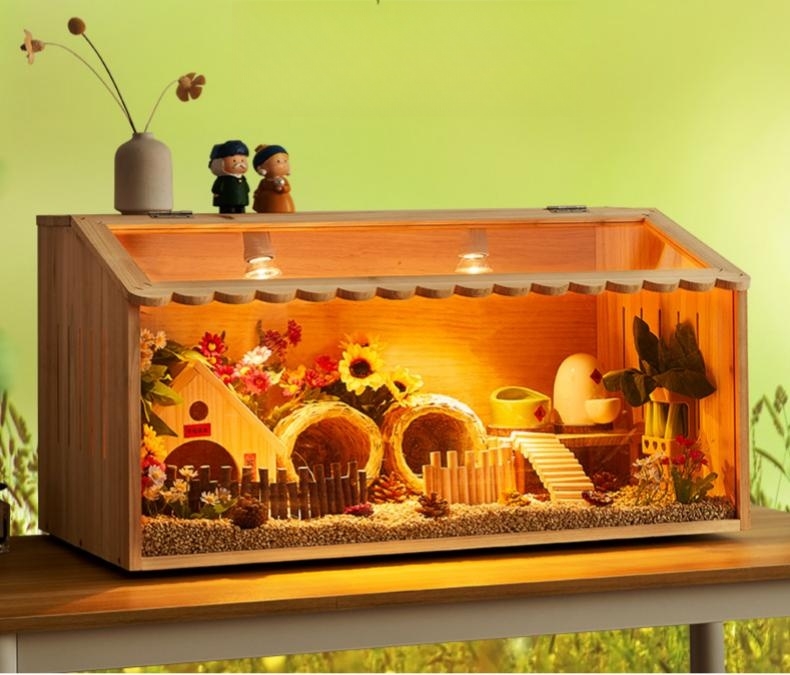
Design a bustling mini town square community for your hamster. Construct neighboring two-story shophouses with removable roof segments and awning overhangs.
Use strips of wood, tile, or linoleum for sidewalks to connect the buildings. Equip storefronts with signage and decorative window displays.
Incorporate a central clock tower, scaled-down greenery, and park benches. Connect buildings with rope bridges and ladders.
With imagined roles for each shop, your hamster can play pretend residents of their own vibrant little town.
To construct the town, cut and join wood blocks into building forms. Paint shop names and window scenes on the front.
Use strips of flooring samples to pave sidewalks and wood cubes for planters. Craft streetlamps from dowels and string lights.
Build bridges from wood and rope. Populate the town with miniature park benches and scaled-down trees and bushes.
Add playful touches like a limousine made from a matchbox car and balloons as street decor. With thoughtful accessories and décor, you can craft a whimsical world for your hamster to explore.
Setup the cage in a quiet room away from drafts, direct sunlight, and noise to reduce stress.
Don’t forget to consider scatter feeding and provide cork logs and other chew toys within the hamster cage to keep your hamsters happy and engaged!
Building your own one-of-a-kind hamster habitat provides many rewards beyond cost savings. The DIY process allows you to cater to your specific pet’s personality, energy level, and needs.
Customizing the layout also prevents boredom by offering ongoing novelty as you modify the habitat over time. The ability to create multi-level worlds not found in commercial cages, including bin cages, enhances enrichment dramatically.
DIY also lets you match the cage style to your home decor for a cohesive look. But perhaps most importantly, you’ll gain the satisfaction of providing your beloved pet with a handcrafted home exhibiting your care and creativity.
A homemade habitat also facilitates sterilization and pest control. You can bake any pieces to sterilize them before introducing your hamster.
Controlling every material going into the cage reduces risks. DIY also allows full customization of accessory and layout placements optimized for your individual hamster’s movements and behavior.
You can add elements commercial cages lack like sprinkler systems for self-cleaning. The DIY process enables you to put your hamster’s wellbeing first.
Beyond structural designs, also consider fun themes that add playful elements to hamster cages.
To fully realize a creative theme for a DIY hamster cage, consider which decorative elements will make the world feel complete. Source or construct scaled-down accessories that fit the theme.
Use color to set the mood – a midnight blue alien planet, cotton candy pink princess palace. Incorporate lighting like string lights or lanterns to create ambiance.
Use thematic bedding like sand for beaches or wood chips for forests. Choose feeding dishes and hides that match the theme.
Design custom wall art like family portraits for a dollhouse or a jungle mural. Play music to highlight the theme like regal fanfares in a castle.
Let accessories tell a story and transport your hamster into their exciting imaginary world.
Looking at examples online and in books can provide helpful inspiration for your own DIY hamster cage. Notice how others use materials creatively to simulate natural environments and structures.
Observe intelligent layouts that balance space, accessories and access. Take note of small flourishes that bring whimsical themes to life.
Gain inspiration from other living spaces like dollhouses, treehouses, miniature towns and fairy gardens. Sometimes a detail like a spiral staircase or drawbridge can spark a whole new cage vision!
Allowing your creativity to percolate between observing others’ designs and making your own wishlist is key.
The possibilities for DIY hamster cages are truly endless! Whether you favor nature themes or imaginative worlds, or designs that your hamster loves, you can bring your ideas to life.
If you’re feeling inspired to create a custom habitat that provides mental and physical enrichment, it’s time to break out your tools. Bringing your vision into reality will be incredibly rewarding for both you and your lucky little hamster.
Just take it step-by-step, use safe materials, and most importantly – have fun! Your pet will soon be living in a stimulating dream home envied by all other hamsters.
Are you ready to begin your DIY hamster cage adventure? Let creativity flow!